Beyond the queue: Why modern mavericks refuse to wait their turn
Patience may be a virtue, but waiting has become more than an inconvenience—it’s a liability. For a new breed of…

Getting your software to do what you want it to shouldn’t be as difficult as climbing the Burj Khalifa. Luckily for you, Setmore is super flexible and lets you channel your inner Ethan Hunt to customize a solution for virtually any problem, no Ghost Protocol required (that’s the last one, we promise).

We love it when innovative people use Setmore beyond the scope of what we’d originally dreamed. So after taking in your feedback and paying attention to all the wonderful ways in which you improvise using Setmore, we’ve put together this collection of hacks in the hopes that other readers can learn, duplicate, and succeed.
Review Setmore Hacks Vol. 2 >
How to: create a public-facing calendar that shows your availability; link your Booking Page in different languages; and more.
Review Setmore Hacks Vol. 1 >
How to: use Setmore for multiple locations; cap the number of appointments available in a day; and more.
Setmore already lets you embed your Booking Page on your website. But if you want to limit the available services and date/times to a specific staff member’s availability, you can do that too.
Step 1 – Go to Settings > Staff and pick a staff member profile. At the bottom of the staff member profile, find the area for Staff Booking Page URL and copy the web address found there.
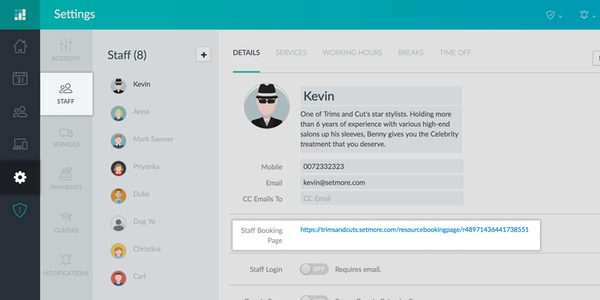
Step 2 – Add the following HTML excerpt to your website, only replace the red font text with your Staff Booking Page URL:
<iframe src=”staff_booking_page_URL” width=”100%” height=”100%” frameborder=“0″></iframe>
Save and publish your changes to the webpage where you want the staff member’s Booking Page to appear.
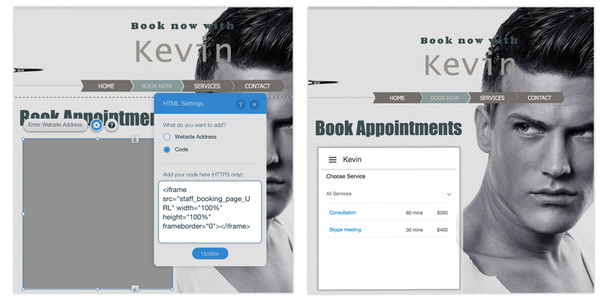 Step 3 – The staff member’s Booking Page will appear on your website. This will allow customers to only book appointments and times with this staff member – they won’t have access to other staff member profiles in your Setmore account.
This is super useful if you want to give each staff member a customizable page on your website, while still giving customers direct access to book an appointment. It also allows you to do nifty things with staff calendars, such as using them for one-time events, or segmenting your services based on a separate location or separate hours.
If you have a special promotional event that will be run on a one-time-only basis, you can use this trick to let customers book their attendance at the event or at certain times within the event timeframe. This could be for a pop-up stand, a free account setup, or something as simple as a face-painting booth (just as an example).
Step 1 – Create a new staff for the event, give it the name of the event. This name will appear at the top of the Booking Page once deployed. Copy the Staff Booking Page URL from this profile.
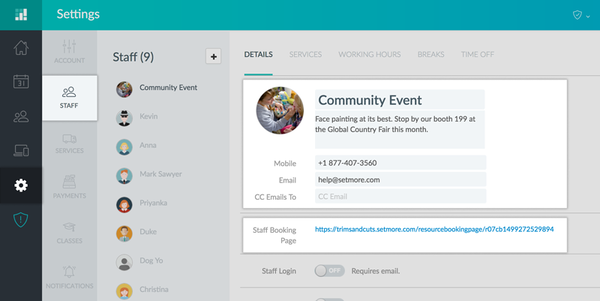
Step 2 – Create a new service for the event, and assign only the event service to the staff profile created in step 1. Give it a thumbnail image, a duration, and a cost if applicable.
Step 3 – Create a separate webpage for the event on your website, and follow the directions in Hack #1 to deploy the staff Booking Page here. This will limit customers’ access to only the event Booking Page.
The key benefit here is that it will link to your existing Setmore account, so you can manage everything all in one place. And if you have Setmore Pro, then you’ll also get the benefit of any email or text reminders that are automatically set for each appointment.
When you first created your Setmore account, you were given the option to log in using your existing Google or Facebook account. While not necessarily a hack per se, for some Setmore integrations you’ll need a traditional email-based username and password that doesn’t rely on either Google or Facebook. Here’s how you switch over:
Step 1 – From inside your Setmore account, click the Profile button in the top-right corner and select “Username/password.”
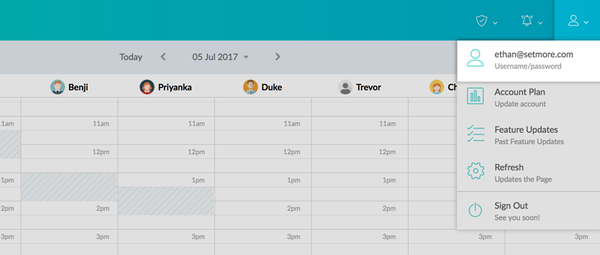
Step 2 – In the My Details window, click the “Change My Password” link.
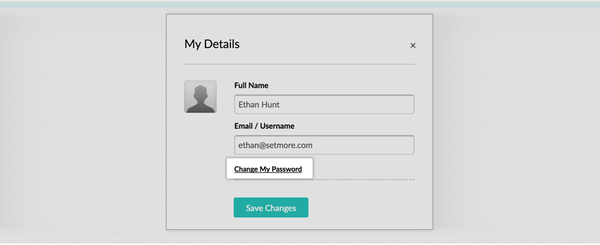
Step 3 – Leave the field under Old Password blank. Enter your new password twice where prompted and click “Save Changes” when everything looks good. Your password is now updated and you can start using your email address and password to log in.
You’ll need a legit username and password if you want to integrate Setmore with some of our supported productivity apps, like Zapier, which require you to sign in with a Setmore account through Zapier (but they don’t let you do it with Facebook or Google).
Whether two or more staff members share a single workspace, a single piece of equipment, or maybe a single set of tools – if only one customer can be serviced at a time, then you’ll need some way to block out availability across multiple staff calendars once a timeslot is booked. Setmore Pro users can accomplish this using the Google 2-way sync and a shared Gmail account.
Step 1 – Go to Settings > Staff and choose a staff profile.
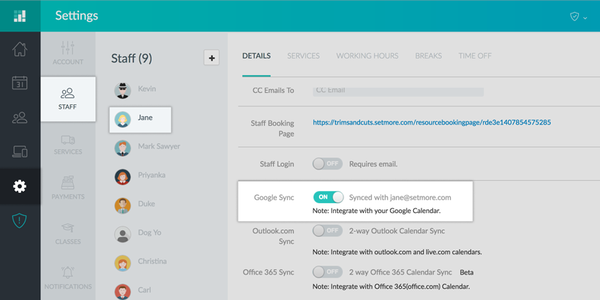
Step 2 – Activate the switch for Google Sync, and you’ll be prompted to sign in with your Gmail username and password.
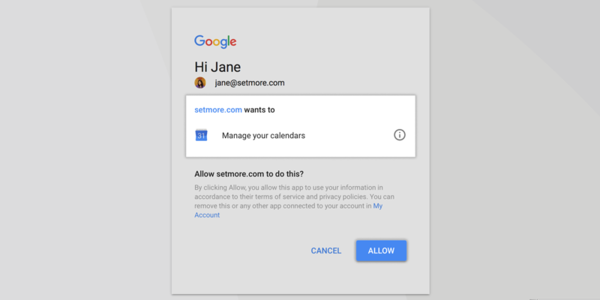
Step 3 – Repeat this process for any number of staff members by activating the two-way sync with the same Google account.
Now when an appointment gets booked for one staff member, the Google 2-way sync will duplicate the same appointment across other synced staff calendars as well, blocking out their availability and preventing customers from double-booking the same room or equipment.
Our main goal in building Setmore was to make an appointment scheduling and management platform that’s uncomplicated, simple, and organized. But with a little bit of cleverness, Setmore can help you accomplish more than what we intended. Our work continues, but if our platform helps turn business owners into innovators and problem solvers, then that’s even better.
Is there a hack that we haven’t covered yet and it works well for you? Post a comment below and share your knowledge!
Thanks,
– Team Setmore

by Srilakshmi
Content writer and scheduling expert at Setmore Appointments.

